Showing posts with label lunch. Show all posts

Monday, July 28, 2014

Delicious Homemade Tortas!


Let me start this post by saying that I LOVE sandwiches.  They can be eaten at home or on the go.  They are easily customizable, easy to make and absolutely delicious.  The Mexican torta is no exception.  I grew up eating all sorts of tortas whenever I would visit Mexico City.  Some came from restaurants, some from little shops or huts and some were made at the local market.  As good as all those were my favorites were always the ones prepared by either my grandmother or my mother. Those always seemed to have the extra something and personal touch that made them stand above all others. 

Before jumping into how to make your own torta, let's take a look into what a torta really is.  At its most basic a torta is just a sandwich, in other words, it is two pieces of bread that have a bunch of tasty ingredients wedged between them.  What really differentiates a torta from other sandwiches is the type of bread used to make it.  A torta is made with a bolillo, which is an oblong crusty white bread with a soft interior.  


A variety of the bolillo is the telera though it has a more rounded shape, is divided in three sections, and is usually softer.


The bolillo is the foundation of a good torta, so having a good bolillo is essential.  Luckily finding good bolillos is not difficult, especially if you live somewhere with a significant Hispanic population.  Here in Houston I have a lot of choices.  I can always go to the panaderia (Mexican bakery) right down the street.  Or if I am doing my weekly shopping I can just pick some up at my local HEB in their bakery.  Heck I am even lucky enough to have La Michoacana (a local grocery chain catering to Hispanic clientele) that sells both bolillos and teleras.  If you are not lucky enough to have any of these resources at hand and simply cannot find bolillos or teleras, use French rolls or Italian bread.  My mom says even a baguette can be used in a pinch. 

Like with anything in life, there is a great variety in the types of tortas made.  Usually they are simply classified by what they are made with. For example a tora de jamon is a torta made with ham or a torta de huevos is one made with scrambled eggs.  Besides the main ingredient and the bread itself tortas vary by just how they are prepared.  Some are served cold or prepared simply while others are made hot on a griddle.  In Guadalajara there is a variation call the " torta ahogada" or drowned torta due to the fact that after the sandwich is made it is then smothered in a red sauce. 

Making your own torta is as easy as making a ham sandwich.  As stated earlier you will need some bolillos to start with.  Since bolillos come in whole pieces you will then need to split them in half.  Once the bread has been cut it is important to remove some of the migajon, or soft white part from the upper piece of the bread.  This will give you a concave piece of bread that will help hold the sandwich together.


Once you have your bread ready you can go ahead and leave it as is to make your sandwich or you can toast it in the oven.  We choose to toast our bread in a 350 degree oven for about 5-10 min.

While the bread was toasting my mom and I gathered up our sandwich fixings which included refried black beans, mustard, Mexican cream, queso fresco, sliced pickled jalapeno, ham, head cheese, fresh tomatoes, avocado, and red onion.


After the bread was done toasting, we were ready to build our tortas.  First thing we did was spread our cream on the concave side of the bread.  We then spread the black beans and mustard on the bottom half of the bolillo. 


Next we started piling on the meats. First the ham, then the head cheese. After the meat was arranged so it would lie flat against the bread we added the queso fresco.  Now we cut the cheese into slices, but it is possible and acceptable to crumble it and add it to your sandwich this way.


 Then we started to add the veggies such as the onions, tomatoes, and avocado.  It is important to try to add the veggies in a manner to keep them flat so that they won't slide off your sandwich. 


The last thing we added to the torta before topping it off with the other piece of bread was the pickled jalapenos.  The jalapenos add little kick as well as a nice tang to the overall flavor profile of the sandwich. 


All that was left to do was put the lid on the sandwich and enjoy.  The sandwiches were so massive that we simply had to cut them in half just to handle them.  They were a great lunch and so delicious.  They reminded me so much of my visits to Mexico City.


The beauty of the torta is in its simplicity.  A torta is so easy to assemble and to make it just how you want it.  For instance I know head cheese may not be the most popular ingredient.  If that is the case with you then just simply leave it out.  Are you a vegetarian?  Then make yourself a torta de aguacate (avocado)!  The choice is yours. Hopefully this inspires some of you to just go out there get yourself some fresh bread and go nuts! 


Saturday, December 28, 2013

In Honor of National Chocolate Day, Try Some Mole

Today, December 28, is national chocolate day. That is great for chocoholics everywhere. But what if you don't have a sweet tooth? Well, there is at least one way that I know of to enjoy chocolate on this day that is not sweet. I'm talking about mole. Mole is a traditional Mexican savory sauce that can be used with just about anything. Mole, like Mexican cuisine itself, has a considerable number of variations dependent on region, custom, family tradition, even an individual cook's style. The most "typical" mole people think of is a thick rich dark brown to brick red concoction made of dried chiles, peanuts, other spices, and unsweetened chocolate.

To make truly authentic Mexican mole is a long arduous process involving multiple steps as well as a plethora of ingredients. For this reason mole sauce bases are the easiest way to prepare it. Even in Mexico it is not uncommon to use a premade base. However, those are usually available at the local market and usually prepared by the person selling it. Here in the US, there are many brands you can find at your local supermarket. El Mexicano, Doña Maria, and La Costeña come to mind. They are typically concentrated so you will have to add liquid to it.

If you are willing to and brave enough, you can always try making your own. The internet is filled with recipes for all levels of cooking acumen. In fact, here are some good ones:

Authentic Mole Recipe

Quick Chicken Mole Recipe

Mole Sauce Recipe

Rick Bayless Red Mole Sauce


So there you have it. Mole sauce works well on everything from chicken to shrimp to even eggs. On this national day of chocolate go out and enjoy some chocolate, even without a sweet tooth.

Wednesday, October 30, 2013

Cumin Roasted Carrots with Fresh Mint and Honey

Recently at my place of employment, I have been moved from the Italian food station to what they call "Whole + Sum".  This area is what you would call the health food.  At first I was a little hesitant about being moved there because who wants to cook and eat rabbit food, right?  However, my executing chef helped me realize that there is more to it than meets the eye.  The challenge is to make good food that is healthier for you.  And if one is to grow professionally, one must take challenges head on and see them as opportunities.  So, one of the first side dishes I made was the cumin roasted carrots with fresh mint and honey.  It is an intriguing way of using carrots and quite tasty to boot.

The first thing I needed was carrots, lots and lots of carrots.  Given that I work in a professional kitchen, all I had to do was ask my sous chef to order me some carrots.  What he gave me were batonnet cut carrots.  Now, if you can't find this cut at your local super market, you can always cut them yourself, or just another type of carrot.  Baby carrots or sliced work well.  Try to avoid matchstick carrots.

Next I gathered all the ingredients I would need.  This included cumin, chopped garlic,


fresh mint,


honey, olive oil,

orange and lemon juice.


I chopped the mint and divided it into halves.  One half I wold toss with the carrots before cooking and the other I would use as garnish after cooking. 

Next, I took the juices, garlic, honey and half my mint, as well as the oil and made a sort of vinaigrette.  I combined the first five ingredients and slowly whisked in the oil. 

After I had my dressing, I tossed my carrots in it along with the cumin.  After being tossed and dressed, the carrots went on a sheet pan and into the oven.


The carrots took about 20 - 25 minuets in the oven.  When they came out, I panned them up and garnished with my reserved mint and they were ready for service!


The carrots are flavorful but low sodium and low fat.  This is great way to eat your veggies. For those of you who want to do this at home, here is a simple recipe:

2 lbs carrots
2-3 cloves garlic, chopped
5 sprigs of fresh mint
1/4 cup olive oil
3 tbsp honey
1/4 cup orange juice
1/8 cup lemon juice
1-2 tbsp cumin

Prepare carrots by cutting them into whatever shape you would like.

Fine chop mint and separate into halves.

Mix garlic, half the mint, honey and juices.  Slowly drizzle in olive oil while whisking until everything is incorporated and smooth.

Toss carrots with mixture.

Place carrots on a sheet pan and sprinkle with cumin evenly.

Roast carrots in a 350 degree oven for about 20 minutes.  Check after 15.

Carrots should be tender, but not mushy.  Some might have a light char on them, but they should not be burnt. If the carrots are not done, let them cook longer checking in 5 minute intervals.

Once the carrots are done, sprinkle with the other half of your mint. 

Enjoy!

Tuesday, August 27, 2013

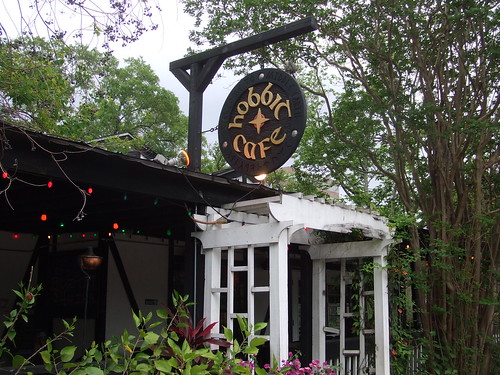
Hobbit Cafe

The Hobbit Cafe has been a Houston eatery since back in 1972.  I have been in Houston since 1998 and I had never been.  It took an old friend visiting from California to get me in the door.  I had heard about the place and was curious, but never enough to actually step foot in the door.  Located on Richmond between Kirby and Greenbriar, The Hobbit Cafe is tucked away in a little alcove of different establishments.  Having driven by on many occasions and having seen the sign I always thought the building facing the street was the establishment.  In actuality,  it is hidden towards the back.
The first thing I noticed when I arrived was the quaint feel and relaxed atmosphere of the place.  It looked like a place where you could be comfortable with yourself and whoever you were dining with.  Since I was eating with a rather large group we were seated outside.  There was ample room but we still had to separate the group into two.  To combat the oppressive Houston heat and humidity fans were placed throughout the patio.  Truth be told, they did not really do a whole lot to help and I consider myself lucky to have gone somewhat early in the day.  Two other things I noticed about the seating was that the chairs were all cheap plastic chairs and that the tables were covered with cheap plastic table clothes that felt a little sticky.  These two things did not really fit in with the rest of the aesthetic, but could be overlooked.

Smaug's Delight w/ Bacon and Fruit
Smaug's Delight w/ Sprouts and Black Beans
Having scooped out the online menu beforehand, I already had in mind what I wanted to order.  This was a good thing because The Hobbit Cafe has a vast menu with lots to choose from and plenty of tempting choices.  I decided to order the The Smaug's Delight, which is a smoked turkey sandwich served on toasted wheat bread with melted cheese and avocado.  You have your choice of the slim or classic version. I was hungry enough so I order the classic.  I was also prompted by the waiter if I wanted to add bacon or alfalfa sprouts.  Since everything is made better with bacon, I opted for the bacon. When asked what I wanted as my side, I asked for my options.  I was presented with the choices of chips, fries, shredded carrots, black beans, and fresh fruit.  I went with the fruit.  Others at the table also got the Smaug's Delight but with other options so it was almost like a different sandwich. 


Another member of our table ordered The Dwalin, which is a sandwich of curry chicken salad with grapes, almonds, lettuce, tomato, and mayo, with a side of shredded carrots.


My sandwich was good.  The turkey was moist and flavorful.  The cheese was hot and melty and the bacon was cooked crisp.  My only complaint is that the sandwich had too much avocado.   "How in the hell can there ever be too much avocado?", you ask.  Well, when about a third of the volume of your sandwich is made of avocado and it compromises the structural integrity and overwhelms the other ingredients is when you have too much. 


Mithril Mix
Athelas Kiwi Strawberry
Before arriving I had decided that I wanted to try one of their smoothies as well.  The way I had interpreted the menu I thought the sandwiches came without a side.  I figured I could have a smoothie instead.  I ordered the Mithril Mix which is simply a strawberry, banana, and pineapple smoothie.  My friend from out of town ordered the Athelas Kiwi Strawberry.  The smoothies were good, but nothing really spectacular.


Along with my smoothie I also ordered a mixed berry tea.  It was spot on for the hot summer day.  It had a great bright red color that made it look really appetizing.  Even without sweetener, it was very tasty.  I had a flavor not unsimilar to water with a hint of lemon it, only stronger.


The one thing I will say was beyond excellent was the gingerbread pancake.  My friend ordered just one pancake so he could taste it and let me have a bite.  It blew my mind.  It was moist and fluffy and it tasted like GINGER-BREAD.  What I mean by that is the pancake did not taste like gingerbread in the shape of a pancake.  It tasted like a pancake with some ginger accents.  It was great.


The Hobbit Cafe has some intriguing menu items that make me want to come back.  However, I feel I must warn you about a number of things.  While the prices on the menu are reasonable, I did feel that they failed to convey some of the charges that ended up on my bill.  For instance, I was expecting the sandwich to not include a side.  However when the waiter asked me what side I wanted, he did not tell me that they were extra, or there was a steep substitution fee.  This was also true of the bacon.  Now, while I kind of expected a surcharge on the bacon, I was not expecting it to be as much as it was.  I certainly would have declined if I had known via the menu or the waiter.

All in all this was a pleasant experience.  I would not say no to going back.  After all, they have been around for a long time for a reason.

Hobbit Cafe on Urbanspoon

Friday, August 23, 2013

Food At Work: Inside Round

As I have stated before, my primary role at work is to man the Italian food station.  However, every so often (mostly on Fridays) they ask me to work another station.  In this case I was asked to work at the carving station, otherwise know at the Butcher Block.  In this instance I was asked to prepare slow roasted inside round with a wild rice blend and fried mushrooms and topped off with a house made steak sauce.


Let me start by saying that an inside round is a very LARGE piece of meat.  So that way that I prepared meat was that I first cut each round into thirds.  This gave me more surface area to season the meat and also greatly cut down the cooking time.  I then rubbed copious amounts of Montreal steak seasoning on the meat.  I placed all three pieces of each inside round into a deep hotel pan with a wire rack on the bottom and covered them with foil.  The foil served to keep the meat from browning too much too fast. It also helped with the cooking process since it helped keep moisture trapped inside the pan.  This moisture then turns to steam which circulates around the meat and helps cook it faster.  I put the beef in a 275 degree oven  for about 3 1/2 hours.  When the meat was about 90% done I took the foil off to allow the meat to brown.


 I pulled the meat out when the temperature right in the middle was at about 120 degrees.  Even though I cut the original inside rounds down, each piece was quite big.  Pulling the meat out at 120 degrees meant that there would be some variety of doneness with each piece of meat.  The outer edges would be close to medium or medium well while the middle would remain closer to rare. 


The wild rice blend was really just a packaged blend we got from Sysco foods.  In order to make it more appetizing that just cooking it the steamer, I added butter to my rice when I cooked it.  This added some nice flavor and richness.  I also seasoned the rice and tossed with some fresh parsley after it came out of the steamer.


The fried mushrooms were straight forward  fried mushrooms.  I did not batter them myself.  In the kitchen you pick your battles on what you can make fresh and what you have to concede and use something pre-made.  The key to using pre-made items is to know how to use them to get the highest quality.  For instance, the mushrooms had to be fried at the last minute so that they would remain crispy on the outside.


And last is the steak sauce.  The steak sauce was quite easy to make. It complimented the beef quite well and helped give moisture to those who enjoy their meat more well done.


Saturday, June 15, 2013

Scampi Style Lobster Ravioli with Roasted Red Pepper and Artichoke Ragout and Pesto Bread (At Work)

   This dish was inspired by National Lobster Day.  Raviolis are usually pretty popular and today was no exception.  And given the fact that they had lobster in them, well, let's just say I knew I was in for a busy day.

   The first thing I prepared today were the peppers for my ragout. While this was not a true ragout, but more of a ciambotta. It served as basically a topping for my raviolis.  So, like I said, the first thing to do was to roast my peppers.  After they were roasted, cooled and cleaned I diced them up for my dish.  Next I sauteed some freshly chopped garlic in oil.  I allowed the garlic to become aromatic and then seasoned it lightly with salt and pepper.  When the garlic was ready, I tossed in some canned artichoke hearts, allowing them to start heating up and cooking.  I also used some unroasted diced red peppers to add bulk and a contrast in textures.  The last thing I added to the pan was my roasted peppers and some crushed tomatoes.  You don't want to add the roasted peppers too early since they are already cooked.  The crushed tomatoes helped to add body to everything.  I adjusted my seasoning and added some fresh parsley at the very end.


   The pesto bread was also quite easy to make.  All I did was take some baguettes and slice them in half.  I then spread pesto on each half and cut them diagonally to make my individual pieces.  I then put the bread in a 350F degree oven for about five minutes.  You want to make your bread crusty, but still leave the center soft.  Now for the home cook you can easily buy pesto sauce from your grocery store or you can make your own. 


   The lobster raviolis were no problem at all. Given that they were already made and all I had to do was boil/cook them.  A little addendum to that.  When cooking stuffed pastas like ravioli or tortellini, you can tell when they are done cooking when the pasta begins to float.  Now, let me pull back the curtain on the professional kitchen, or at the very least, my kitchen.  While we try to do a lot of things ourselves from scratch, some things are just too time consuming and labor intensive to do.  It cases like this where our talents can be used on other things that we buy stuff pre-made. 


   Scampi usually refers to a large shrimp or langoustine that has been cooked and served in a garlic butter sauce.  So to make this dish scampi style, I made a garlic lemon butter sauce.  I started by sauteing plenty of garlic in oil.  Once the garlic softened I added a little white wine and lemon juice.  I waited for that to reduce slightly before I added more water.  After everything came up to a boil, I thickened the mixture with a little corn starch.  Then I slowly whisked in enough butter to give the sauce its velvety texture and buttery flavor.  I seasoned it with salt and white pepper.  I even made a little extra so that I could toss my ravioli in the sauce before being put on the plate.


   The last thing that accompanied this dish was a side salad.  Nothing to fancy here, just a mixture of romaine lettuce with spring mix as the base.  I used shredded carrots and cherry tomatoes to mix in with my lettuce.  As a dressing I used a zesty Italian.  I would premix some of my salad and have it ready for when orders would come in.  The last thing I want to do is waste time making a salad for each individual customer.


Wednesday, June 5, 2013

Food at Work: Pistachio Crusted Salmon

Today's entry is one that is my chef's signature dish.  I made this dish a few weeks back and it sold very well.  Today was no different. I made over 140 portions and sold out.  It combines salmon, which is always popular with a different way of preparing it.  So many times salmon is just grilled or baked that it can get boring.  So thanks to Chef Victoria Cloud for the recipe.

Executive Chef Victoria Cloud
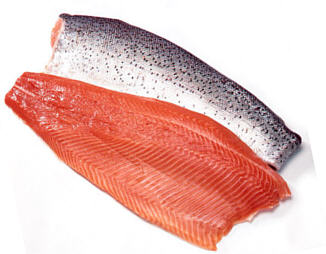
The first step for me to make this dish was to portion out my salmon.  At work we get in whole salmon fillets.  Usually I start by taking off a small portion from the belly side and one from the tail end just to give the fillet a better shape to portion with.  I personally don't like to take off the skin because I like the skin and I also find it is easier to remove it once the fish is cooked if I must take it off.  I then cut my individual portions trying to get them from 4-5 oz.  Now, for those of you at home, you don't necessarily have to cut off what I do and you can make your portion size however big you want.  Truthfully though, I would not make them much bigger because the bigger the fish, the longer it will take to cook.

The next thing I do is to make my crust.  Essentially what I do is take some pistachios and peanuts and chop them up in a food processor.  Now, you want them to be almost like a corn meal consistency.  If there are a few big chunks of nuts here and there, that is ok.  The one thing you want to be careful of  is to over process.  If you do that you start to have nut butter instead of meal.  Once you have processed your nuts, you mix them with sesame seeds and a little olive oil.  I have also found that if you are short on nuts, you can add some panko or bread crumbs to help stretch it out.

Now, the first time I made this dish I seasoned each portion of salmon individually.  This time around I seasoned the crust mixture itself.  In order to crust the fish it could not be easier.  All you have to do is place it in a dish with sides and press the fish into it placing each finished portion on a sheet pan sprayed with cooking spray.  The fish's natural moisture will help the crust to stick and cooking it in the oven will finish the job.

Once you have crusted all your fish all you have to do is stick them into a 350F degree oven for about 10-15 minute or until the fish is firm but flaky. (145F degree internal temp)  The fish will be nice and cooked and your crust will be nice and toasted.  


The salmon was laid upon a bed of capellini pasta. The capellini (angel hair) pasta I cooked according to my guidelines with a few notes.  Because capellini is such a thin and delicate noodle it is very easy to over cook to such a degree that it can actually be perfectly cooked in your pot of water and over cook by the time you take it out of the water and cool it down.  The key to cooking capellini is to under cook it slightly.   Take it out of the water when it is still just a bit too hard.  Even if you plan on serving it immediately, it can still over cook with the residual heat from the water.


The salmon was served with Sauteed Harvest Beans with Mushrooms.  Harvest beans are a fancy way of saying green beans.  To make my beans all I did was saute some garlic in oil to get it nice and aromatic.  I then added my mushrooms and let them cook until mostly soft.  I seasoned the mix with salt and pepper.  At this point I added my green beans and let them cook.  In this case I used frozen green beans.  Fresh is best but frozen is also good, especially if they are flash frozen.  I then seasoned everything with salt, pepper and Italian seasoning.


The salmon was covered with a very tasty roasted garlic butter sauce.  I started off by cooking some minced garlic in oil.  In order to make two gallons of sauce I used about a cup and a half of garlic and maybe a cup of oil.  I let the garlic cook until it started to get brown.  You have to take care because garlic can go from brown to burnt in the blink of an eye.  Once the garlic was brown I added about a cup of flour and let the cook stirring constantly to make a roux.  I let it cook for about a minute or two and which point I added two quarts of cream stirring the while added the cream so as not to get lumps.  I also added a gallon and a quarter of water.  I let the mixture heat up to a soft boil, stirring occasionally.  While the cream and water was heating up I cut into pieces three pounds of cold butter.  Once the liquid was hot, I slowly incorporated the butter adding a couple of pieces at a time and stirring until they mostly melted before adding more.  After all the butter was added I added salt and white pepper.  The result was a creamy, velvety sauce for my salmon.


Monday, June 3, 2013

Food At Work: Shrimp ala Arrabbiata

   I had a crazy thought at work today.  I thought "Hey, I cook at work.  Why don't I document and share some of the stuff I make at work on my blog?"  So today I made shrimp ala arrabbiata over linguini with sauteed olives and peppers and a saffron cream sauce. 

   Arrabbiata sauce is an Italian sauce made from garlic, tomatoes and red chiles. Translated from Italian it literally means "angry".  This is due to the red chiles. I had 30 lbs of shrimp to work with to make my shrimp ala arrabbiata.


 Linguini worked well because nice long noodles provided a nice base for all the other ingredients to settle on.  Like a well put together building, you need to have a good foundation.


The sauteed peppers and olives were quite easily put together.  I just julienned red, green, and yellow bell peppers then sauteed them in oil with garlic, black olives, Italian seasoning and salt and pepper.

The saffron cream sauce was also fairly easy to prepare.  I set the cream to simmer while I steeped the saffron in hot water.  When the cream was nice and hot, I added the saffron (water and all) to it and seasoned it all with salt and pepper.  I used a little corn starch to give my sauce body.  Right before service I added some fresh herbs (parsley and rosemary) to the sauce.

Putting together the dish was just a matter of layering it all together starting with the pasta followed by the shrimp and then the vegetables and finished with the cream sauce.