Showing posts with label how to. Show all posts

Sunday, April 26, 2015

Wine Bottle Opening: A How To


Wine is good.  A lot of people enjoy wine.  But how many know how to properly open a bottle?  This thought occurred to me while I was attending a function hosted by a friend of a friend.  During this great social event we sampled a great many wines from different countries.  As more and more bottles were opened it became very apparent that our gracious host had no idea how to properly open a bottle of wine. Not wanting to be rude I kept my mouth shut and at the end of the day the bottles were opened and we were able to enjoy the wine.  But I was still amazed at the lack of this simple knowledge.

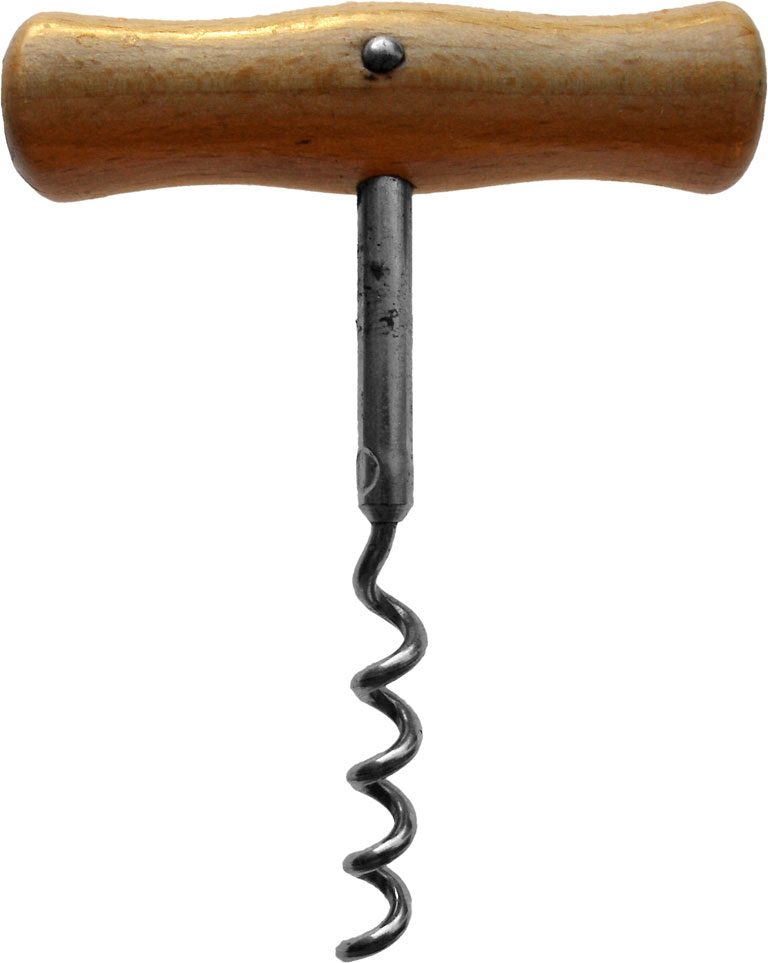
Before we get into the nuts and bolts of how we have to review hardware.  Nowadays there is a multiplicity of options to get your bottle open.  The basic corkscrew is just a piece of metal twisted in a helix fashion (known as the worm) fixed to a handle.

Next we have the wing corkscrew.  It is also known as the butterfly or angel corkscrew.  The name is due to the dual levers that resemble a pair of wings.


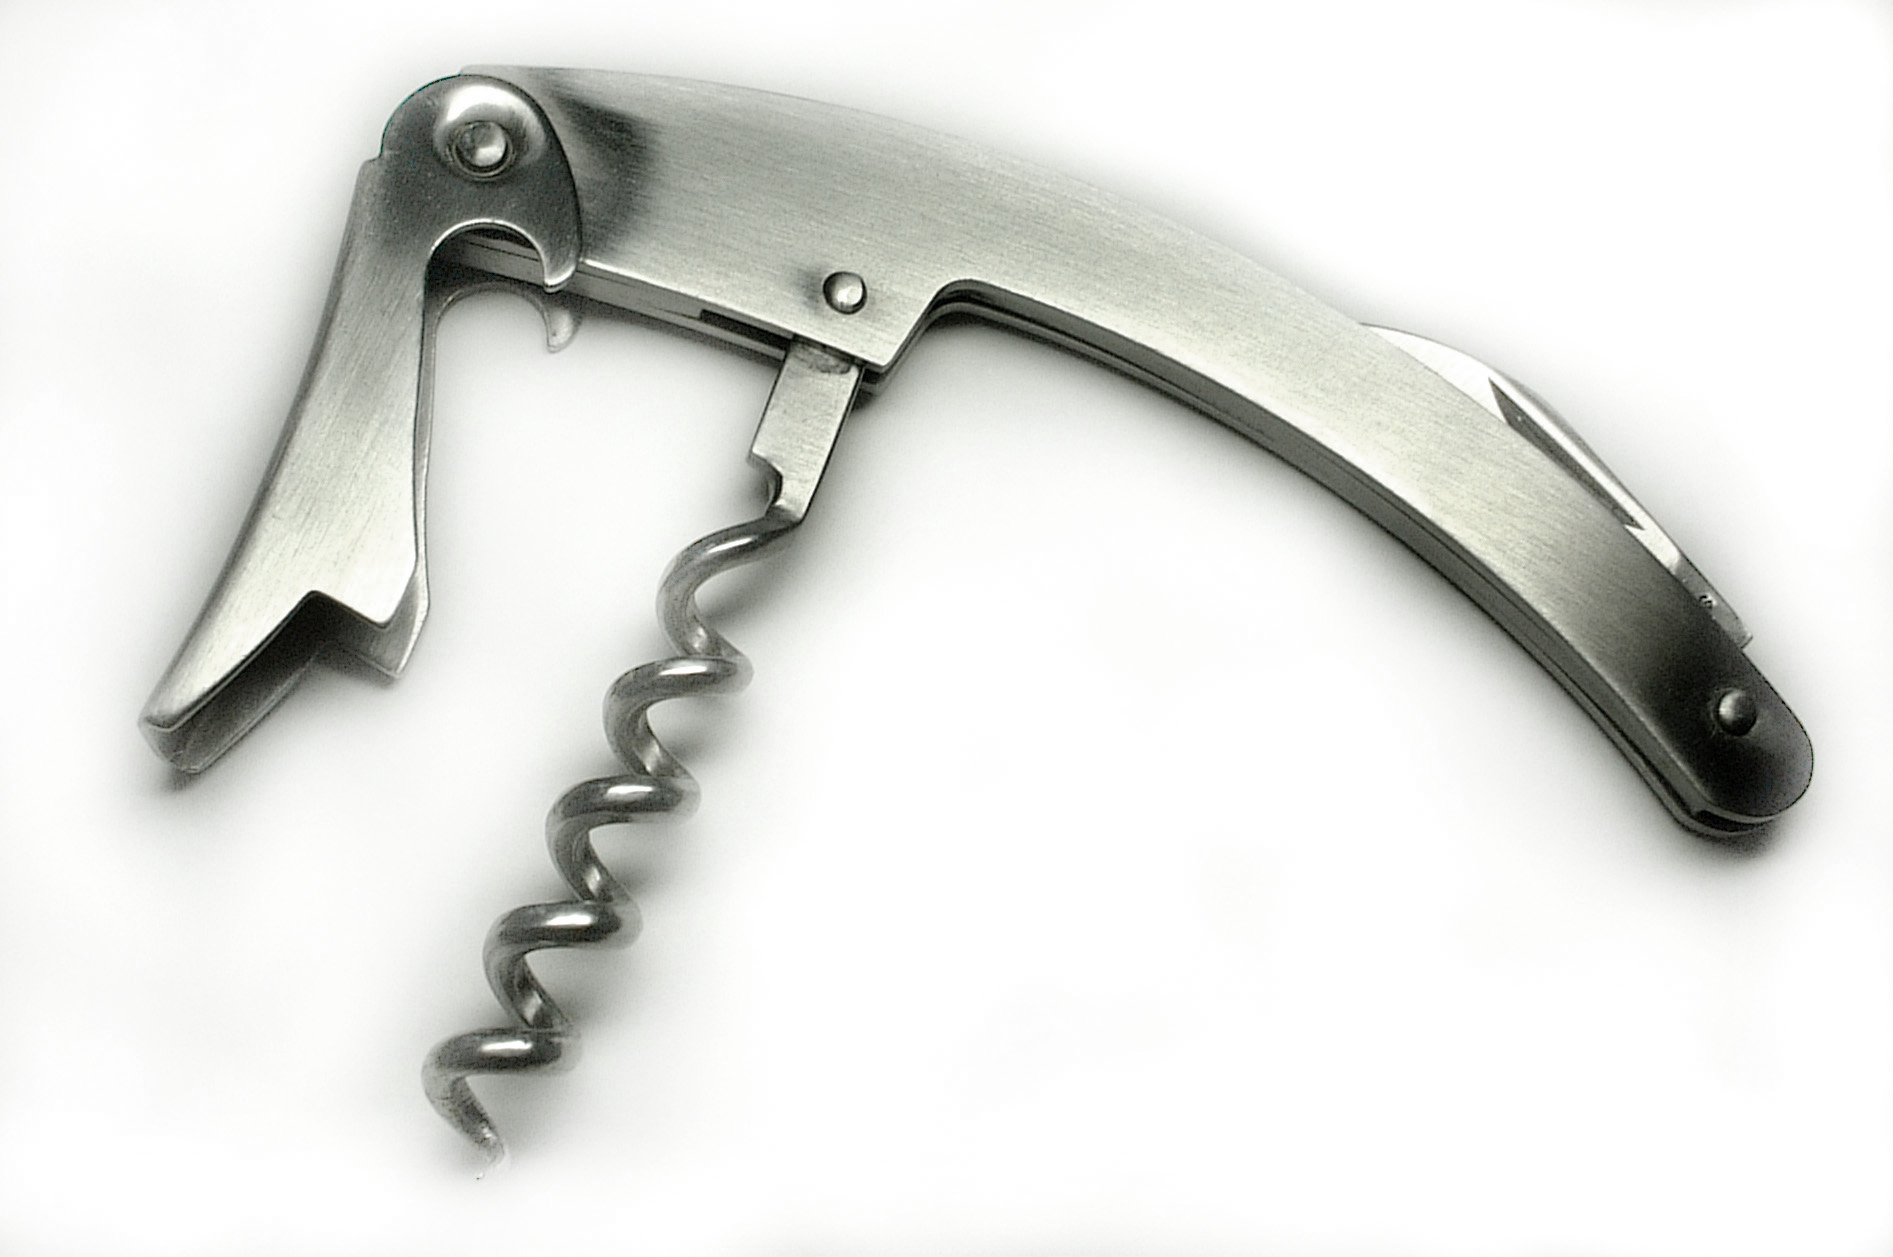
A more complicated wine opening apparatus is known as the sommelier knife, waiter's friend, or wine key.  This corkscrew resembles a small pocket knife with the worm being folded into the handle when not in use.  The wine key also has a metal arm that folds to cover the worm and serves as a lever when opening the bottle.

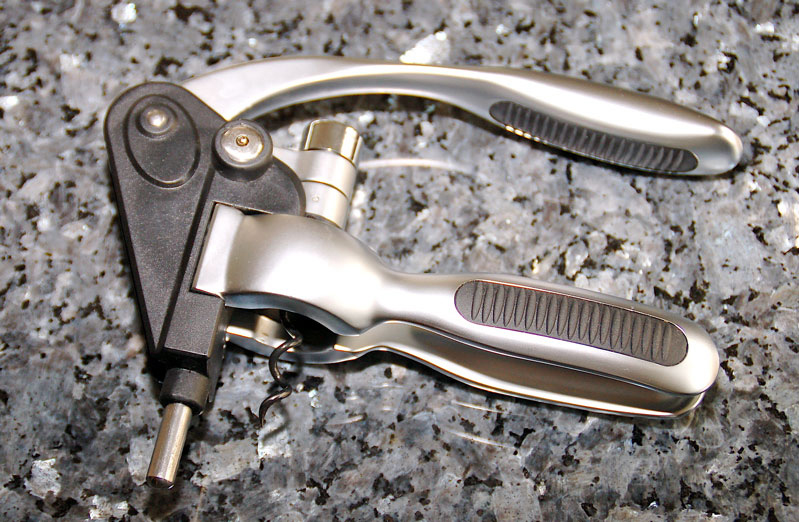
 The last device I will be discussing is a lever or rabbit corkscrew.  This device uses a pair of handles which are used to grip the neck of the bottle, and a lever which is simply pressed down to twist the screw into the cork, then lifted to extract the cork.


First lets take a brief look at the anatomy of a bottle.  The bottle consists of a neck, shoulder, body, and the heel or punt. The parts we are concerned with are from the neck up. The neck is narrower than the rest of the bottle so it may hold the stopper, often known as a cork due to cork being the primary material used to make the stopper in the past.  The opening is also called the finish and often has a slightly wider ring known as the collar.  The collar is an important part to opening a bottle of wine.

 The first step to opening a bottle of wine, no matter which device you use is to remove the foil covering the neck.  More specifically it is only necessary to remove the part covering the finish, or just from the collar up.  Completely removing this foil allows the wine to flow easily from the finish of your bottle.  The best way to remove the foil is to simply use a run a small knife around the bottle at the tip of the collar.  This will score the foil so that it may be peeled off.  A wine key more often than not has a small blade attached to it for this purpose.

This model has two small teeth imbedded in the body.

Once the foil has been removed it is time to extract the stopper.  The basic corkscrew requires that the user grips the handle and screws the metal point into the stopper then use brute strength to pull out the stopper.  The wing corkscrew facilitates this by using a mechanical means to remove the stopper.  As a person screws the worm into the stopper, the levers, or wings, lift up due to the dual gears.  Once the worm is fully inserted the user simply needs to pull down the levers and the stopper will lift out of the bottle.  The gadget that is probably the easiest, fastest, but also the most cumbersome and expensive is the lever corkscrew.  To use this device a person simply need to place the worm over the stopper, lower the lever and then lift.  The corkscrew does the rest.

The device that requires the most skill to use, but which I consider to be the most elegant, is the wine key.  It is a nuanced mechanism that combines form and function.  It is small enough that it can be carried in a pocket.  That is why is also known as a waiter's friend, since waiters will carry one on their person with ease.  Its design is simple enough that it can be made inexpensively. The "key" is knowing how to use one.  The truth is that it is really not that hard once you know what you are doing.

After the foil has been removed the first step is to open the key so that it resembles a basic corkscrew.


Next screw the worm into the stopper until it is firmly embedded in the stopper.


This is where a great many people go wrong.  Once the helix is in there, most people would just pull on the wine key as if it were just a basic corkscrew.  Buy doing this they are eliminating the advantages of the wine key.  No, the next step is to tilt the body of the wine key so that the metal tab lines up with the collar of the bottle.  If the bottle happens to lack a collar, it might be possible to align the tab with the opening.


Now use the metal tab as a lever to pull up the stopper.  This is done by lifting on the opposite side of the wine key. If necessary use both hands: one to apply the levering action and the other to hold the metal tab in place.


The cork should clear the opening, but if it does not it should be far enough out of the bottle that it can easily be pulled out the rest of the way.


Now that you have your bottle open the next step, which is the easiest, is to simply enjoy your libations! 

Saturday, August 10, 2013

Thickening Agents

In the culinary world more often than not you have to add viscosity and body to something you are preparing, whether that be a soup, a sauce, or a stew.  Luckily for the cooks of the world there are a variety of methods for doing just that.  Each method has its own pros and cons as well as a preferred application.  The most traditional and most commonly used methods is through the gelatinization of starches. Some other methods include reduction and adding an already thickened substance.  When you thicken something your goals should be to avoid lumps, have a good clean taste that is not pasty or floury, have a good consistency and that it will not separate or break when being held.

One of the most classic methods, and generally one of the first taught is the use of roux.  At its most basic roux is simply equal parts flour and fat (by weight) that have been cooked together to make a paste.  Roux varies by color gradient ranging from white, blond, and brown roux.  You achieve a darker color roux by cooking the flour and fat longer.  The color of the roux plays a part in what you are using the roux for.  White roux is used for things that are either white in color or where no added color is wanted.  Dark roux is used in dark colored items, such as gumbo.  Another important note is that as you cook a starch you remove some of its ability to gelatinize in liquid, so you will need more dark roux than lighter roux to thicken the same amount of liquid.

The procedure for making a roux is the same no matter what the color.  First heat your fat in a heavy bottomed saucepan taking care not to burn it.  After the fat is nice and hot add your flour.  General purpose flour is ok to use, but pastry or cake flour work better for roux making due to the higher starch content.  Avoid high gluten flour.  Stir your flour and fat mixture until you reach your desired color.  White roux does not take very long while dark roux can take several minutes.  When you are cooking your roux it is important to watch over it and constantly stir it.  Roux, especially when making dark roux, can go from tasty thickening agent to burnt disgusting mess in an instant.  Burnt roux does not thicken anything and will make your food taste bad.  A little trick I have learned for making dark roux without constantly watching over it is to put your roux on a sheet pan (cookie sheet with four sides) and put it in a 200 degree oven until you reach your desired color.  A good roux will have a nice almost nutty smell and will be slightly stiff, nor runny.

When you have made your roux you can incorporate it into your food in two ways.  You can let your roux cool down and add it to hot liquid, or you can add cold liquid to your hot roux.  In either case it is important to stir vigorously with a whisk so that the liquid and roux are properly incorporated and you avoid lumps.  After your roux has been added you need to allow your liquid to heat up to a boil.  This will cook out any of the flour taste and allow the starch to gelatinize.

Another way to use flour and fat(butter) to thicken items is to make a beurre maniĆ©.   Beurre manie is equal parts flour and butter, by weight, that have been kneaded together.  The mixture is then whisked slowly into a simmering liquid to thicken.  Unlike roux, the mixture remains uncooked and it generally added at the end of the cooking process as a finishing technique or as a quick thickener.  The butter adds shine and flavor as it melts.

The next way to add thickness to liquids is to use cornstarch.  Cornstarch is much easier to use than roux because the only thing you need to do to use it is to mix it with water to create a slurry.  Once the cornstarch is completely incorporated with the water, just slowly stir it into hot liquid.  The liquid does not necessarily need to be boiling, but it does at the very least need to be simmering. Unlike roux, cornstarch will have a more immediate effect.  Cornstarch is used heavily in Asian cuisine.  It gives liquids a glossy sheen that may or may not be desired.  Cornstarch also has the benefit of having twice the thickening power of flour.  However, liquids thickened with cornstarch are less stable as it can lose its thickening effects over prolonged heating.  Also, products that have been thickened with cornstarch should not be reheated.

An alternative to cornstarch and flour as a thickener is arrowroot.  Arrowroot is derived from the roots of several tropical plants and is similar in texture and appearance to cornstarch.  In fact, you use it the very same way.  You mix it with cold water making a slurry than whisk that into a hot liquid.  Arrowroot has slightly more thickening power than  cornstarch, is not affected by acidic ingredients or freezing, thickens at a lower temperature than flour or cornstarch and it has a more neutral flavor.  Arrowroot however, does not work well with dairy products, producing a slimy texture when it does.  Arrowroot also has a tendency to break down when overheated and is quite a bit more expensive.

When not using starch to thicken liquids you have some options at your disposal.  The easiest is to  thicken something by reduction.  All this means is that you allow the liquid to cook down until it is reduced in volume.  This method is especially useful for making sauces or glazes.  Just keep in mind that when you are reducing something the flavor of your liquid is being concentrated into the remaining liquid.  Another way you can add viscosity to your liquids is by incorporating an already thickened liquid or item to it.  Many a time I have added tomato paste to a tomato based sauce or soup to give it the consistency I wanted.  It is also not uncommon to add thickness using demi-glace to a sauce.  Just keep in mind that your desired thickness will have to be based on what you want thickened and what you are adding to thicken it.  You can't turn an au jus into a gravy with nothing but a reduction or by adding only demi-glace to it.

One quick final note about thickening.  It is always important to try to achieve your desired thickness with whatever method you are using.  However, if you over thicken something the solution is just to add more liquid so you get it to where you want it.  You may end up with slightly more product that you had originally intended and you may have to adjust your seasoning, but that is better than serving a gravy when you just wanted a light sauce. 

Saturday, August 3, 2013

Quick And Easy Alfredo

Part of my job duties at work are to have the sauces prepared for the make your own pasta bar.  These include marinara, alfredo, and pesto.  Today I will be talking about the alfredo sauce specifically.

Alfredo sauce is typically referred to a cream sauce that includes Parmesan cheese and butter.  However, the reality is classically there is no such thing as an alfredo sauce.  Usually the prepared dish was fettuccine alfredo which did not include a sauce.  Instead the noodles were tossed with butter and cheese.  As the cheese melted, it emulsified the liquids into a thick consistency.  Sometimes cream would be added in addition to, or instead of the cheese.

Today alfredo sauce is a completely separate entity and often sold in jars or otherwise prepared.  This is a shame given how easily alfredo sauce can be prepared at home.  At work I will prepare a big batch of several (6-8) gallons to have ready for the week.  I will then heat a smaller amount for the day's use.  I start with equal parts milk and heavy cream.  To save time you can also use half and half which is equal parts milk and cream.  I will then heat the mixture slowly over low heat.  I will prefer to use our large steam kettles. This help me avoid scorching the bottom of my sauce.

Once the dairy is at a simmer, at about 190 to 200 degrees, I start adding my spices and cheese.  For spices I used salt, white pepper (very important it be white), and nutmeg (just a smidge).  I will use good quality grated Parmesan cheese. For the 6-8 gallons, I usually used about 2 1/2 pounds.  You can use shredded cheese, but just know it will take longer to incorporate.  When adding your salt keep in mind that you want to add it sparingly at first since the cheese will also add saltiness to your sauce.  You can adjust the seasonings later.  Now, when you add the cheese, don't just dump it in all at once.  Add it a little at a time and stir the sauce until it is incorporated in.  Repeat this process until all of your cheese has been added.

After all of your cheese and spices have been added it is time to thicken the sauce.  Now, traditionally it is only thickened with cheese and some reduction of the dairy and you can certainly choose to do that.  At work I will usually used a cornstarch slurry to help it along.  While the sauce is still hot, I will stir in the slurry until the sauce has reached the desired consistency.  Now it is very important you add your slurry while the sauce is still hot.  Otherwise the sauce will not thicken.  Now if you ever find that you over estimated how much cornstarch you needed and over thicken your sauce, you can just thin it out with more dairy or even a bit of water.  You can thicken your sauce using various other methods (roux, beurre maniĆ©), but the slurry is honestly the easiest. 

When the sauce is at the desired consistency, you need to taste it.  This is where you can adjust the seasoning.  You can add salt and pepper if needed.  The reason you want white pepper is so that your sauce remains white.  Black pepper will show up as black flecks in your sauce giving it the appearance of cream gravy.  As far as the nutmeg goes, you want to add enough to barley be perceptible.  Nutmeg's flavor goes very well with dairy and you only need a small amount as to not overwhelm the flavor of the sauce.

If you want to make this sauce at home, here are some amounts to help you along the way:

1 cup milk
1 cup heavy cream
OR
2 cups half and half
1/2 cup grated Parmesan cheese
Salt and pepper to taste
1 pinch nutmeg
2 tbsp cornstarch
1/4 water

Serve over your favorite pasta with your favorite ingredients!

Saturday, July 27, 2013

Braised Short Ribs with Mushrooms, Kale and Tortellini

   Remember my review of Little Napoli?  In that review I stated that one of my favorite dishes is the braised short ribs with mushrooms served over tortellini.  Well, one of the advantages and, to a point, luxuries of my profession is that I have the ability to sometimes break down a dish from restaurant and figure out how to make it at home.  After years of working with and preparing food you tend to recognize certain techniques and ingredients in said preparation of food to the point where you have a relatively good idea of how to recreate a dish. Thus is the case with this particular dish.  The short ribs were on sale at HEB, so I figured, why not give it a go.

   First thing first, you will need some hardware.  You will need a heavy bottomed pot that can hold heat very well or even go into the oven.  I prefer to use our, (even though my wife claims it is only hers) enamel coated cast iron dutch oven.  The method of cooking for this dish is braising so the heavy bottom will help protect against scorching.  If you don't think your pot is up to the task, then you can alleviate this problem by sticking it in the oven.  Just make sure your pot can handle that. 

  This first thing I did was gather and prepare all of my mise en place, which is as follows:

1 small to medium white onion

2-3 cloves of garlic
1-2 shallots
1 1/2 -2 cups of flour
Salt and pepper
 olive oil
2 lbs beef short ribs
1 lbs mushrooms
1 qt beef broth
1 bottle red wine
1 lbs kale
1 lbs of tortellini

After you have gathered everything you want to dice your onions and chop your shallots and garlic.


Next, season your flour with salt and pepper and use and whisk to mix it all together.


After that cut your short ribs, which will more than likely com in slabs, into individual pieces.


Dredge the ribs in the flour until they are completely coated and look almost ghostly.


There are some variables to this step.  Instead of seasoning the flour with salt and pepper, you could season your meat directly.  In fact, some might prefer that so that the salt will help draw out some of the moisture from the ribs and help the flour stick to them better.  You could also season at both steps, but just be careful not to over season.  Remember, you can always add,  but you can't remove seasoning.

Next but your pot on the fire and let it come up to temp.  You want the heat pretty hot since you are going to be searing your ribs.  Keep in mind that cast iron does take a while to come up to temp.  Once the pot is hot, add your oil.  You will need enough to cover the bottom of the pot, adding more as you go along.  The reason you might have to add more oil as you go along is because the flour will have a tendency to absorb the fat as it cooks. Sear your ribs in batches, adding only enough to cover the bottom of the pan. Sear and flip so that they are dark brown on each side.


After you have seared your ribs, it is time to add your aromatics.  Add more oil, if necessary, to your pot and allow it to heat up.  Add your onion, garlic and shallots to the pot and allow them to cook until you can smell them and they become translucent.


After they are cooked add your wine.  Now, you don't need an entire bottle of wine, but you can reserve what you don't use and have it with dinner.  You really only need about a cup to cup and a half.  When you add your wine, make sure to scrape the bottom of the pan to release all the tasty little nibblets stuck on there


After you have deglazed your pot, add the ribs back in and cover them with the beef broth.  If for whatever reason you don't have enough broth, you can either add more wine, or just add water.


The next step is easy to do, but requires patience.  All you have to do next is wait.  Set your heat on a low to medium low, slap a lid on the whole thing and let your ribs braise.  Like I said before, it is important that your pot have a heavy bottom.  This will help the liquid from scorching.  If you don't have a heavy bottom pan, you can stick it in a 325 degree oven, or just open the lid every once in a while to stir. The ribs will take anywhere from 2 to 3 hours to cook.  The slow cooking time will allow the meat to become tender and for all the connective tissue to break down.  It will also allow some of the collagen from the bones to seep out into the liquid.

Now while you are waiting, you can do other things such as prep your mushrooms or cook your pastas.  You can always buy pre-sliced mushrooms to cut down on prep.  This time, we bought whole button mushrooms and I quartered them.


You don't want to add your mushrooms right away since the meat will take so long to cook.  Wait until the ribs are almost done, say when you have half an hour to an hour to go.  The kale can wait until the ribs are done.  Just add it to the pot and allow it to cook a little bit.  Now, if you don't like kale, you can substitute spinach.


The tortellini should be cooked so that it will be nice and ready when the rest of the meal is.  You can do it well ahead of time and just refresh in some hot water.

Once everything is in the pot you only need to do two things: taste and adjust the seasoning and adjust the thickness of your dish.  The first thing is easy enough to do.  If the ribs need more salt and pepper, just add some more.  The braising liquid will thicken a bit on its own due to the flour and the collagen, but sometimes it needs a little help.  To thicken, well, pretty much any hot liquid,  you just need a little cornstarch and water.  Just mix up the cornstarch, say 2-3 tablespoon, in half a cup of water, then add that mixture to the hot liquid.  You want to add a little at a time  so that you can control how thick you get the liquid.


The final, and best, step to this is to serve your ribs over hot tortellini and enjoy!


Monday, July 8, 2013

Iron Chef Party: Potluck with a twist


            Do you remember several years ago when the Food Network was still in its infancy?  Celebrity chefs were still kind of a novelty.  And a quirky little food competition made the leap from Japan to the States to find that it was absolutely loved by American audiences.  Then years later after the original had run its course Food Network tried to revive it with the American version.  Well, what if I told you, you could still have that beloved show, only in your own Kitchen Stadium.  What I am talking about is an Iron Chef Party.  This is a potluck dinner party that combines all the elements of eating interesting food, having people cook "competitively", and just a great excuse for a social gathering.

            Let me start with some of the ground rules.  The point of the Iron Chef party, much like the show, is centered on a main ingredient.  The person hosting the party is considered to be the Chairman and thus they choose the ingredient.  In the case of couples it is usually considered that they are both hosting and therefore co-Chairperson, especially if they are married or living together.  The ingredient is chosen anywhere from a couple of nights beforehand up to a week but not much more than that.  You still want a little bit of an element of surprise.  


            Once the ingredient is chosen all the participants prepare a dish using said ingredient.  The day of the event, everyone, including the chairman, brings their dish to the host's place and shares with everyone else.  Now people can bring their dish already prepared or, if the host is willing and able, people can finish prepping at the host's locale.  This proves to be useful for hot entrees or side dishes.  


            Once everyone has shared their dish there is a vote to decided the best dish.  The chairman/host is not in the running since he or she was the one to decide the ingredient in the first place.  How you vote is entirely up to you.  Secret ballot using slips of paper and pens works well.  At one such gathering a friend of mine who is technologically inclined set up a Google doc and had us all vote electronically via email.  Yeah, that is way over my head too.

            After the voting is concluded the winner is announced to the adulation of his peers.  What do you get when you win an Iron Chef party?  Bragging rights, a point of pride or whatever you would like to give out.  My group of friends have made an Iron Chef hat that is passed around when someone wins.  That person keeps the hat until the next Iron Chef party and if someone else wins, they get the hat.  


             So, how do you get started?  Easy, you just declare an Iron Chef party.  You can do this via email or in person or however you would like.  The idea is to try to get together as many people as possible.  In the case of an Iron Chef party the more the merrier is a good mantra.  No good potluck parties ever had only a few people.  Let me give you this one piece of advice.  When you are preparing your dishes, keep in mind that you are not giving everyone a full portion.  We have learned this the hard way over time.  If you have 12 people coming over and everyone is preparing food to feed 12 people...  Well that is a lot of food.  All anyone really needs is a taste.
And what about those people who can't cook for whatever reason?  We have built into our Iron Chef parties what we call wine passes.  Can't cook because you will be stuck at work until party time?  Bring a bottle of wine!  Can't cook because all you know how to make is toast and you burn that?  Bring wine!  Just keep in mind that this is a potluck and you do not want more wine than food or having just  a couple of people feeding everyone else.  One time the host decided to challenge everyone to bring a complimentary bottle of wine with each dish.  We ended up with 13 bottles of wine and 11 participants!


            When you decide to throw an Iron Chef party here are some suggestions for you.  Like with any party pick a time that will accommodate the most number of people.  It's no fun if no one can make your party.  Also keep in mind that there will be large amounts of food and possibly beverage.  That is why I like to have mine on Fridays or Saturdays.  The best ingredients are usually ones that are very versatile.  You want to have a wide range of foods from appetizers , to entrees, to even desserts.  Some of the ingredients we have used have been wine, beer, goat cheese, honey, lime, zucchini, just to name a few.