Showing posts with label at work. Show all posts

Tuesday, February 23, 2016

Tales from the Market Part 1: From Farm to Fork

There is a phrase that has been circulating in the food circles for a while now.  It is popular with chefs, trendy restaurants and even foodies.  You may have heard it before.  That phrase is "from farm to fork".  The first time I heard it was back in 2008 when the chef I worked for assigned me to the gourmet salad station.  But what does this phrase mean?  It is quite elegant in its simplicity.  The phrase simply reflects that the food one consumes goes directly from the farm where it was produced/grown/harvested to the plate of the person eating it with little to no go betweens.  This is a nice idea in theory, in practice it is much harder to achieve.  What I mean to say is that not many people (including chefs) have a direct line to farm to get the food they want.  A good way to get that connection is via a local farmer's market.  At a good quality farmer's market you will find a variety of vendors that can satisfy your need for a local connection to your food.

Last week I had the pleasure and privilege of being taken to the Rice University Farmer's Market by Rice Dining where I had the opportunity to speak and interact with several vendors there.   This was not my first time here, but this was my first time to really explore and see just what the market had to offer.  One of the first vendors we talked to was Chef Chandler Rothbard from Animal Farm Center.  We chatted about what produce he had brought with him as well as what Animal Farm was all about.  I, along with other chefs from work, were able to procure some choice produce. We got some beautiful watermelon radishes as well as some edible flowers.  I personally got some Swiss chard, green onions and some cremini mushrooms. 

From left to right: Watermelon Radishes, Romanesco, Broccoli, Cremini Mushrooms.
 
Me with Chef Chandler and our haul.
Right next to the Animal Farm stand was one from Shiner Pork and Beef.  I decided to see what they had to offer and maybe pick something up.  At first I wanted some delicious pork belly, but all that they had brought was already accounted for.  I tried bacon next, but it was the same situation.  Fortunately they did have some ground pork for sale, so I snatched up a package.

Cooler for of deliciousness.

Ground pork I was able to get.
I spoke to several other vendors including Patrick Bierschwale from Katerra Exotics, Jim from Jim's World of Worms and someone from Angela's Oven.  They were all very pleasant and very knowlegable about their particular products.  Patrick informed me of how they raise their animals, the bison in particular.  Jim provides sprouts for several of the chefs on campus and I learn about the sprouts themselves.  During my time at the farmer's market I also tried kombucha for the first time from 3rd Coast Kombucha  and even had a delicious lavender lemonade from Ripe Cuisine.

Bread from Angela's Oven

Here are a couple of things to keep in mind when visiting a farmer's market.  You can't go to one with a super market or recipe mentality.  What I mean by that is that farmer's markets don't have a specific set of things that will always be for sale that day.  The thing they sell are often seasonal and dependent on many other factors.  So if you are looking for something very specific there might be a chance it is unavailable.  Keep an open mind and maintain flexibility.  It is better if you let the market dictate what you want to purchase and therefore, what you want to create.

Next, take advantage of the people selling you their wares.  More often than not they had a direct hand in growing, making, cultivating what is in front of you.  Don't be shy and ask questions.  They probably relish the opportunity to talk to someone about what they have.  Be adventurous and try new things.  If you don't know what something is or what to do with it, don't hesitate to ask.  This ties back into my previous point.  Don't be afraid of stepping out of your comfort zone.

Lastly, be prepared to spend a little money.  I will say this, as awesome as farmer's markets are, they are not cheap.  Most of the vendors don't have the luxury of mass producing what they are selling.  That means they have quality premium stuff, but it also means you have to pay a little more than what you might normally be accustomed to.  While a farmer's market might not be an every week shopping trip for everyone, the every once in a while splurge is totally worth it. Houston has several markets throughout the city.  Go out there and experience one.   After all its the only real way to experience the "farm to fork"!

Saturday, November 29, 2014

The Truth Behind Leftovers!


Let me preface this post by saying that I am not writing this as a warning or an expose.  I am just writing this as an informative piece on the business that is running a professional kitchen.  I just want to provide a little insight into how things work behind the scenes give everyone a little peek.  So, with that being said, I want to address leftovers.  On more than one occasion I have been asked by a patron at many of the places I have worked at what exactly happens to all the food that is leftover at the end of the day.  The truth is that the answer is not cut and dry.  There are a variety of things that can and do happen to leftover food depending on many factors. 

At the end of the day most kitchens are part of a business that is trying to make money.  One of the biggest expenses that a  culinary operation has is that of food cost and anyone running a kitchen is always trying to keep that food cost down.  A chef will try to take advantage and squeeze out as much production out of all food products purchased.  A very easy way to do that is to use up leftovers as much as possible and in as many creative ways as possible. Now when I say use up leftovers there are a couple of things you must understand.  A good chef will never sacrifice safety or quality for the sake making money.   The leftovers being used must be up to the standards of anything that would be served as if it were being prepared that day.  Those leftovers must also be safe to consume.  All decent establishments with a good record of safety and sanitation will have a use by date for their leftovers (usually 3-4 days).  If leftovers don't meet these quality or safety standards they will not be used and will be thrown out.

When leftovers are being used the easiest way to use them up is to reheat and serve them as is.  However there are a few problems with doing this.  First of all you have the problem of possibly compromising the quality of the product upon reheating.  Proteins have a tendency to dry out when reheated.  Vegetables tend to overcook and just not look as appetizing.  So if the plan is to just reheat and serve, special care is taken to reheat so as to not compromise that quality.  The second problem with just reheating and serving is that someone might recognize the food, especially if the customer base is daily repeat customers such as at a cafeteria or a dining hall.  Some observant guest might recognize the meatloaf you are serving today as the same one you had yesterday. A great way to avoid this predicament is to hold off on serving those leftovers and/or serve them at another station. 

French toast that was reheated and served the next day.


Of coarse the easiest way to avoid those pitfalls of using leftovers is to just reappropriate them and use them for something that was not their original use.  Soups are probably the most common way to do this.   Soups are cheap to make and very versatile.  They can use up most leftovers, including vegetables that normally would not be good for anything else do to the poor quality that they were in.  Chicken or beef that would dry out of reheated can easily be put into a soup.  Leftover rice or pasta also works well in a soup.   That soup of the day you love so much at your local eatery is probably made mostly from leftovers.

Leftovers make great soup.


Soups aren't  the only way to use up leftovers.  Another common destination for leftovers, especially meats, is the deli or as a sandwich filling in general.  Most of the time when assembling a sandwich it will be served cold and if it is not, there will be enough accompaniments that if the meat is a little dry it will not be too noticeable.  Sandwiches can also use up any unused sauces or cheeses from different dishes.  Sandwiches are just a great way to disguise leftovers as a completely different thing. 


Leftover Pork Loin
Turned into Cuban sandwiches

The truth is that leftovers can and are used all over an operation. The way the chef sees it is just free money, or at the very least money has already been spent and can still be taken advantage of.  It is just a matter of being creative and finding different ways to use up what is already there.  I have seen leftover grilled salmon mixed with capers, lemon juice, and mayonnaise and turned into a salmon salad that was then served from the salad bar.  I have seen unused meatballs chopped up and then added to a meat lovers pizza.  I recently ordered some seafood enchiladas from a restaurant.  When I asked the waiter what seafood was in them he told me a little bit of all the different seafood they served.  To me that indicated that more than likely they were just using leftovers to make the enchiladas.  But ultimately that is ok because I know that as long as the quality of the food was still good (they were quite tasty) and my safety was not at risk then the restaurant is just trying to be profitable.  Really that is what using leftovers is all about. Kitchens are just trying to use up and take advantage of what they have on hand. 

Pretty sure these were made with leftovers.

Monday, December 16, 2013

Dilled Potato & Apple Salad

This is a recipe I made at work recently.  At first I was unsure of how the potatoes and apples would play off each other.  But after making it, the salad combine sweet and savory elements in a nice light and refreshing dish.

2 cups fat free plain yogurt
2 tbsp honey
1/8 cup lemon juice, fresh is preferable
Black pepper to taste
3-4 tbsp fresh dill weed or 2 tbsp dried
4-5 medium  or 6-8 small red potatoes
2-3 apples (use a mix of sweet and tart for best results)
1 cucumber peeled and seeded
1-2 carrots shredded (if using preshredded  carrots this is about a cup to a cup and a half)
1 med. to large red onion sliced

In a mixing bowl, combine first 5 ingredients until blended and smooth.  The mixture should have a nice balance between tangy, cream, with a hint of sweetness

The potatoes should be quartered or cut into bite size pieces.  Boil or steam the potatoes until they are fork tender, but not falling apart.  Cool them down.

Core and slice your apples.  If you are not going to prepare the salad immediately, you can store your apples in water with a little lemon juice to avoid them turning brown.

After you peel and seed your cucumber you can dice it, or cut it into half moons

After you have prepared all your fruits and vegetables, mix them  together in a large mixing bowl.  Add your already mixed dressing and toss lightly to incorporate.

Enjoy!


Wednesday, October 30, 2013

Cumin Roasted Carrots with Fresh Mint and Honey

Recently at my place of employment, I have been moved from the Italian food station to what they call "Whole + Sum".  This area is what you would call the health food.  At first I was a little hesitant about being moved there because who wants to cook and eat rabbit food, right?  However, my executing chef helped me realize that there is more to it than meets the eye.  The challenge is to make good food that is healthier for you.  And if one is to grow professionally, one must take challenges head on and see them as opportunities.  So, one of the first side dishes I made was the cumin roasted carrots with fresh mint and honey.  It is an intriguing way of using carrots and quite tasty to boot.

The first thing I needed was carrots, lots and lots of carrots.  Given that I work in a professional kitchen, all I had to do was ask my sous chef to order me some carrots.  What he gave me were batonnet cut carrots.  Now, if you can't find this cut at your local super market, you can always cut them yourself, or just another type of carrot.  Baby carrots or sliced work well.  Try to avoid matchstick carrots.

Next I gathered all the ingredients I would need.  This included cumin, chopped garlic,


fresh mint,


honey, olive oil,

orange and lemon juice.


I chopped the mint and divided it into halves.  One half I wold toss with the carrots before cooking and the other I would use as garnish after cooking. 

Next, I took the juices, garlic, honey and half my mint, as well as the oil and made a sort of vinaigrette.  I combined the first five ingredients and slowly whisked in the oil. 

After I had my dressing, I tossed my carrots in it along with the cumin.  After being tossed and dressed, the carrots went on a sheet pan and into the oven.


The carrots took about 20 - 25 minuets in the oven.  When they came out, I panned them up and garnished with my reserved mint and they were ready for service!


The carrots are flavorful but low sodium and low fat.  This is great way to eat your veggies. For those of you who want to do this at home, here is a simple recipe:

2 lbs carrots
2-3 cloves garlic, chopped
5 sprigs of fresh mint
1/4 cup olive oil
3 tbsp honey
1/4 cup orange juice
1/8 cup lemon juice
1-2 tbsp cumin

Prepare carrots by cutting them into whatever shape you would like.

Fine chop mint and separate into halves.

Mix garlic, half the mint, honey and juices.  Slowly drizzle in olive oil while whisking until everything is incorporated and smooth.

Toss carrots with mixture.

Place carrots on a sheet pan and sprinkle with cumin evenly.

Roast carrots in a 350 degree oven for about 20 minutes.  Check after 15.

Carrots should be tender, but not mushy.  Some might have a light char on them, but they should not be burnt. If the carrots are not done, let them cook longer checking in 5 minute intervals.

Once the carrots are done, sprinkle with the other half of your mint. 

Enjoy!

Thursday, September 26, 2013

Polenta's Potential Predicated

Polenta. What is it exactly?  It sounds like something exotic and crazy.  But really, it is such a simple dish that has the potential to be extraordinary!  For those of you who grew up in the south, polenta is no more than Italian grits.  Now I know some will cry out that "Grits and polenta aren't the same thing!"  Well, yes and no.  You see polenta and grits share some very fundamental and basic attributes.  Polenta and grits are both essentially dried ground corn that is slow cooked in hot liquid to make a porridge like concoction.  Both can be cooked with water alone, but we all know they are better with butter and cream.  And both can be creamy and runny or as hard as mortar. The key differences are really what they are made of and what you put in them.  Polenta is generally made with ground yellow cornmeal while traditional grits are made from hominy.  Polenta has an Italian slant to it, meaning that any spices or seasoning as well as cheese added to it will be Italian.  Grits usually are associated with Southern cuisine and served as a side dish with little to nothing added although cheesy grits are an exception. 

Now that we have that comparison out of the way, lets talk more about polenta.  At work I have become somewhat of an expert polenta maker.  In fact, I had to save my sous chef's polenta when he was about to do a chef's table!  That polenta turned out so well that one of our customers insisted on the recipe (provided below).  Since I usually make large quantities and I usually make mine by feel and instinct, I had to sit down and think about it.


So what makes a good polenta?  The first thing you have to know about polenta is how you want to serve it. As stated previously, polenta can be creamy and almost fluffy like good mashed potatoes, or nice and firm like a piece of cornbread.  Knowing what you are going to do with your polenta before you start goes a long way to achieving that goal.  Next, you have to let the polenta dictate how it will cook and how much you will need.  As much as a recipe calls for certain amounts and times, it really comes down to how the food behaves and how you react to that.  Lastly, good polenta takes fat and calories.  It is difficult to make really good polenta that is low cal.

Here are a couple of tips and tricks for good polenta making:

When buying your ingredients, don't be fooled into buying fancy packages of "polenta mix".  It is all just cornmeal.  The cornmeal is just as good for about a third of the price.

Don't get cornflour.  You generally want coarsely ground cornmeal.  Cornflour is just really finely ground cornmeal. For whatever reason, I have found that it does not make for good polenta.  It just ends up grainy.

Polenta will continue to cook even after you take it off the fire.  That means it will get thicker.  Take it off the heat a bit before your desired consistency.  Keep in mind when you are adding your cheese that it will also add density.

If your polenta ever ends up too thick or dense, just add some hot liquid to loosen it up.  At work I use hot water from the pasta machine.

If you are transferring your polenta to a serving dish, spray your dish and whatever utensils you are using to transfer with cooking spray.  This makes serving it easier. 

For firm polenta that can be cut into shapes, add enough cornmeal to make it difficult to stir, but not impossible.

When making polenta for cutting, make sure you spread it in your dish or baking pan before it sets.  You can now cool it and save it for later.  Once you are ready to serve it, you can reheat it by baking, grilling or searing it.

Polenta is versatile.  You can add anything from mushrooms to sundried tomatoes.  Get creative.

Recipe:

1 cup milk (2% works well)
1 cup cream
1/2 cup water
2-3 cloves of garlic minced (garlic powder works in a pinch)
3-4 tbsp Italian Seasoning  or fresh herbs1/2 to 1 cup coarsely ground cornmeal (grits can serve as a substitute)
1/4 to 1/2 cup grated Parmesan or your favorite Italian cheese
1/4 to 1/2 stick of unsalted butter
Salt and Pepper to taste (if you can, use white pepper)

Mix your milk, cream and  water in a sauce pan big enough to hold double the volume of the liquid.

Add your minced garlic to the liquid. You can also choose to add the dried herbs now, or wait until later.  If using fresh herbs, it is best to wait.

Heat your liquids on medium high heat until they simmer.  Do not allow liquid to boil over or scorch on the bottom. 

Once the liquid is simmering, begin to add the cornmeal a little at a time slowly, whisking continuously to avoid lumps.  As the cornmeal cooks it will thicken slightly.  Once you have reached your desired thickness, lower the heat.

Add your cheese, butter, seasoning and herbs(if you have not done so already).  Keep stirring the mixture until the cheese and butter are completely incorporated.
 

Serve and enjoy!

Friday, August 23, 2013

Food At Work: Inside Round

As I have stated before, my primary role at work is to man the Italian food station.  However, every so often (mostly on Fridays) they ask me to work another station.  In this case I was asked to work at the carving station, otherwise know at the Butcher Block.  In this instance I was asked to prepare slow roasted inside round with a wild rice blend and fried mushrooms and topped off with a house made steak sauce.


Let me start by saying that an inside round is a very LARGE piece of meat.  So that way that I prepared meat was that I first cut each round into thirds.  This gave me more surface area to season the meat and also greatly cut down the cooking time.  I then rubbed copious amounts of Montreal steak seasoning on the meat.  I placed all three pieces of each inside round into a deep hotel pan with a wire rack on the bottom and covered them with foil.  The foil served to keep the meat from browning too much too fast. It also helped with the cooking process since it helped keep moisture trapped inside the pan.  This moisture then turns to steam which circulates around the meat and helps cook it faster.  I put the beef in a 275 degree oven  for about 3 1/2 hours.  When the meat was about 90% done I took the foil off to allow the meat to brown.


 I pulled the meat out when the temperature right in the middle was at about 120 degrees.  Even though I cut the original inside rounds down, each piece was quite big.  Pulling the meat out at 120 degrees meant that there would be some variety of doneness with each piece of meat.  The outer edges would be close to medium or medium well while the middle would remain closer to rare. 


The wild rice blend was really just a packaged blend we got from Sysco foods.  In order to make it more appetizing that just cooking it the steamer, I added butter to my rice when I cooked it.  This added some nice flavor and richness.  I also seasoned the rice and tossed with some fresh parsley after it came out of the steamer.


The fried mushrooms were straight forward  fried mushrooms.  I did not batter them myself.  In the kitchen you pick your battles on what you can make fresh and what you have to concede and use something pre-made.  The key to using pre-made items is to know how to use them to get the highest quality.  For instance, the mushrooms had to be fried at the last minute so that they would remain crispy on the outside.


And last is the steak sauce.  The steak sauce was quite easy to make. It complimented the beef quite well and helped give moisture to those who enjoy their meat more well done.


Saturday, August 3, 2013

Quick And Easy Alfredo

Part of my job duties at work are to have the sauces prepared for the make your own pasta bar.  These include marinara, alfredo, and pesto.  Today I will be talking about the alfredo sauce specifically.

Alfredo sauce is typically referred to a cream sauce that includes Parmesan cheese and butter.  However, the reality is classically there is no such thing as an alfredo sauce.  Usually the prepared dish was fettuccine alfredo which did not include a sauce.  Instead the noodles were tossed with butter and cheese.  As the cheese melted, it emulsified the liquids into a thick consistency.  Sometimes cream would be added in addition to, or instead of the cheese.

Today alfredo sauce is a completely separate entity and often sold in jars or otherwise prepared.  This is a shame given how easily alfredo sauce can be prepared at home.  At work I will prepare a big batch of several (6-8) gallons to have ready for the week.  I will then heat a smaller amount for the day's use.  I start with equal parts milk and heavy cream.  To save time you can also use half and half which is equal parts milk and cream.  I will then heat the mixture slowly over low heat.  I will prefer to use our large steam kettles. This help me avoid scorching the bottom of my sauce.

Once the dairy is at a simmer, at about 190 to 200 degrees, I start adding my spices and cheese.  For spices I used salt, white pepper (very important it be white), and nutmeg (just a smidge).  I will use good quality grated Parmesan cheese. For the 6-8 gallons, I usually used about 2 1/2 pounds.  You can use shredded cheese, but just know it will take longer to incorporate.  When adding your salt keep in mind that you want to add it sparingly at first since the cheese will also add saltiness to your sauce.  You can adjust the seasonings later.  Now, when you add the cheese, don't just dump it in all at once.  Add it a little at a time and stir the sauce until it is incorporated in.  Repeat this process until all of your cheese has been added.

After all of your cheese and spices have been added it is time to thicken the sauce.  Now, traditionally it is only thickened with cheese and some reduction of the dairy and you can certainly choose to do that.  At work I will usually used a cornstarch slurry to help it along.  While the sauce is still hot, I will stir in the slurry until the sauce has reached the desired consistency.  Now it is very important you add your slurry while the sauce is still hot.  Otherwise the sauce will not thicken.  Now if you ever find that you over estimated how much cornstarch you needed and over thicken your sauce, you can just thin it out with more dairy or even a bit of water.  You can thicken your sauce using various other methods (roux, beurre manié), but the slurry is honestly the easiest. 

When the sauce is at the desired consistency, you need to taste it.  This is where you can adjust the seasoning.  You can add salt and pepper if needed.  The reason you want white pepper is so that your sauce remains white.  Black pepper will show up as black flecks in your sauce giving it the appearance of cream gravy.  As far as the nutmeg goes, you want to add enough to barley be perceptible.  Nutmeg's flavor goes very well with dairy and you only need a small amount as to not overwhelm the flavor of the sauce.

If you want to make this sauce at home, here are some amounts to help you along the way:

1 cup milk
1 cup heavy cream
OR
2 cups half and half
1/2 cup grated Parmesan cheese
Salt and pepper to taste
1 pinch nutmeg
2 tbsp cornstarch
1/4 water

Serve over your favorite pasta with your favorite ingredients!

Saturday, June 15, 2013

Scampi Style Lobster Ravioli with Roasted Red Pepper and Artichoke Ragout and Pesto Bread (At Work)

   This dish was inspired by National Lobster Day.  Raviolis are usually pretty popular and today was no exception.  And given the fact that they had lobster in them, well, let's just say I knew I was in for a busy day.

   The first thing I prepared today were the peppers for my ragout. While this was not a true ragout, but more of a ciambotta. It served as basically a topping for my raviolis.  So, like I said, the first thing to do was to roast my peppers.  After they were roasted, cooled and cleaned I diced them up for my dish.  Next I sauteed some freshly chopped garlic in oil.  I allowed the garlic to become aromatic and then seasoned it lightly with salt and pepper.  When the garlic was ready, I tossed in some canned artichoke hearts, allowing them to start heating up and cooking.  I also used some unroasted diced red peppers to add bulk and a contrast in textures.  The last thing I added to the pan was my roasted peppers and some crushed tomatoes.  You don't want to add the roasted peppers too early since they are already cooked.  The crushed tomatoes helped to add body to everything.  I adjusted my seasoning and added some fresh parsley at the very end.


   The pesto bread was also quite easy to make.  All I did was take some baguettes and slice them in half.  I then spread pesto on each half and cut them diagonally to make my individual pieces.  I then put the bread in a 350F degree oven for about five minutes.  You want to make your bread crusty, but still leave the center soft.  Now for the home cook you can easily buy pesto sauce from your grocery store or you can make your own. 


   The lobster raviolis were no problem at all. Given that they were already made and all I had to do was boil/cook them.  A little addendum to that.  When cooking stuffed pastas like ravioli or tortellini, you can tell when they are done cooking when the pasta begins to float.  Now, let me pull back the curtain on the professional kitchen, or at the very least, my kitchen.  While we try to do a lot of things ourselves from scratch, some things are just too time consuming and labor intensive to do.  It cases like this where our talents can be used on other things that we buy stuff pre-made. 


   Scampi usually refers to a large shrimp or langoustine that has been cooked and served in a garlic butter sauce.  So to make this dish scampi style, I made a garlic lemon butter sauce.  I started by sauteing plenty of garlic in oil.  Once the garlic softened I added a little white wine and lemon juice.  I waited for that to reduce slightly before I added more water.  After everything came up to a boil, I thickened the mixture with a little corn starch.  Then I slowly whisked in enough butter to give the sauce its velvety texture and buttery flavor.  I seasoned it with salt and white pepper.  I even made a little extra so that I could toss my ravioli in the sauce before being put on the plate.


   The last thing that accompanied this dish was a side salad.  Nothing to fancy here, just a mixture of romaine lettuce with spring mix as the base.  I used shredded carrots and cherry tomatoes to mix in with my lettuce.  As a dressing I used a zesty Italian.  I would premix some of my salad and have it ready for when orders would come in.  The last thing I want to do is waste time making a salad for each individual customer.


Wednesday, June 5, 2013

Food at Work: Pistachio Crusted Salmon

Today's entry is one that is my chef's signature dish.  I made this dish a few weeks back and it sold very well.  Today was no different. I made over 140 portions and sold out.  It combines salmon, which is always popular with a different way of preparing it.  So many times salmon is just grilled or baked that it can get boring.  So thanks to Chef Victoria Cloud for the recipe.

Executive Chef Victoria Cloud
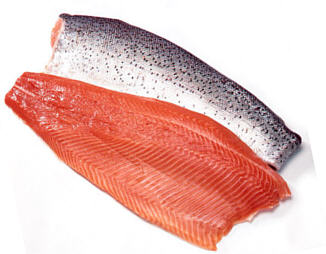
The first step for me to make this dish was to portion out my salmon.  At work we get in whole salmon fillets.  Usually I start by taking off a small portion from the belly side and one from the tail end just to give the fillet a better shape to portion with.  I personally don't like to take off the skin because I like the skin and I also find it is easier to remove it once the fish is cooked if I must take it off.  I then cut my individual portions trying to get them from 4-5 oz.  Now, for those of you at home, you don't necessarily have to cut off what I do and you can make your portion size however big you want.  Truthfully though, I would not make them much bigger because the bigger the fish, the longer it will take to cook.

The next thing I do is to make my crust.  Essentially what I do is take some pistachios and peanuts and chop them up in a food processor.  Now, you want them to be almost like a corn meal consistency.  If there are a few big chunks of nuts here and there, that is ok.  The one thing you want to be careful of  is to over process.  If you do that you start to have nut butter instead of meal.  Once you have processed your nuts, you mix them with sesame seeds and a little olive oil.  I have also found that if you are short on nuts, you can add some panko or bread crumbs to help stretch it out.

Now, the first time I made this dish I seasoned each portion of salmon individually.  This time around I seasoned the crust mixture itself.  In order to crust the fish it could not be easier.  All you have to do is place it in a dish with sides and press the fish into it placing each finished portion on a sheet pan sprayed with cooking spray.  The fish's natural moisture will help the crust to stick and cooking it in the oven will finish the job.

Once you have crusted all your fish all you have to do is stick them into a 350F degree oven for about 10-15 minute or until the fish is firm but flaky. (145F degree internal temp)  The fish will be nice and cooked and your crust will be nice and toasted.  


The salmon was laid upon a bed of capellini pasta. The capellini (angel hair) pasta I cooked according to my guidelines with a few notes.  Because capellini is such a thin and delicate noodle it is very easy to over cook to such a degree that it can actually be perfectly cooked in your pot of water and over cook by the time you take it out of the water and cool it down.  The key to cooking capellini is to under cook it slightly.   Take it out of the water when it is still just a bit too hard.  Even if you plan on serving it immediately, it can still over cook with the residual heat from the water.


The salmon was served with Sauteed Harvest Beans with Mushrooms.  Harvest beans are a fancy way of saying green beans.  To make my beans all I did was saute some garlic in oil to get it nice and aromatic.  I then added my mushrooms and let them cook until mostly soft.  I seasoned the mix with salt and pepper.  At this point I added my green beans and let them cook.  In this case I used frozen green beans.  Fresh is best but frozen is also good, especially if they are flash frozen.  I then seasoned everything with salt, pepper and Italian seasoning.


The salmon was covered with a very tasty roasted garlic butter sauce.  I started off by cooking some minced garlic in oil.  In order to make two gallons of sauce I used about a cup and a half of garlic and maybe a cup of oil.  I let the garlic cook until it started to get brown.  You have to take care because garlic can go from brown to burnt in the blink of an eye.  Once the garlic was brown I added about a cup of flour and let the cook stirring constantly to make a roux.  I let it cook for about a minute or two and which point I added two quarts of cream stirring the while added the cream so as not to get lumps.  I also added a gallon and a quarter of water.  I let the mixture heat up to a soft boil, stirring occasionally.  While the cream and water was heating up I cut into pieces three pounds of cold butter.  Once the liquid was hot, I slowly incorporated the butter adding a couple of pieces at a time and stirring until they mostly melted before adding more.  After all the butter was added I added salt and white pepper.  The result was a creamy, velvety sauce for my salmon.


Monday, June 3, 2013

Food At Work: Shrimp ala Arrabbiata

   I had a crazy thought at work today.  I thought "Hey, I cook at work.  Why don't I document and share some of the stuff I make at work on my blog?"  So today I made shrimp ala arrabbiata over linguini with sauteed olives and peppers and a saffron cream sauce. 

   Arrabbiata sauce is an Italian sauce made from garlic, tomatoes and red chiles. Translated from Italian it literally means "angry".  This is due to the red chiles. I had 30 lbs of shrimp to work with to make my shrimp ala arrabbiata.


 Linguini worked well because nice long noodles provided a nice base for all the other ingredients to settle on.  Like a well put together building, you need to have a good foundation.


The sauteed peppers and olives were quite easily put together.  I just julienned red, green, and yellow bell peppers then sauteed them in oil with garlic, black olives, Italian seasoning and salt and pepper.

The saffron cream sauce was also fairly easy to prepare.  I set the cream to simmer while I steeped the saffron in hot water.  When the cream was nice and hot, I added the saffron (water and all) to it and seasoned it all with salt and pepper.  I used a little corn starch to give my sauce body.  Right before service I added some fresh herbs (parsley and rosemary) to the sauce.

Putting together the dish was just a matter of layering it all together starting with the pasta followed by the shrimp and then the vegetables and finished with the cream sauce.